Keyboard and mouse ergonomics that reduce forward head posture start with three anchors: keyboard at or slightly below elbow height, mouse inside your primary reach zone on the same surface, and the top third of your screen at or slightly below eye level. Get those three right and your head tends to follow your spine instead of drifting forward.
Three things to test right after adjusting:
- Does your chin feel level rather than tilted down toward the screen?
- Can you reach the mouse without lifting your elbow or rolling your shoulder forward?
- Is your gaze landing naturally on the upper portion of the screen without neck strain?
Table of Contents
- How do you set up your workstation to stop forward head posture?
- Why does workstation positioning actually affect your neck?
- How do you measure forward head posture and track your progress?
- What setup mistakes make forward head posture worse?
- What daily habits reinforce your new setup?
- When should you expect results, and when should you see a doctor?
- Key Takeaways
- The part most ergonomic guides skip
- What Bestforwardheadposturefix offers readers who want to go further
- Useful sources
How do you set up your workstation to stop forward head posture?
A proper ergonomic desk setup takes about five to seven minutes and starts from the floor up.
-
Set your chair height first. Sit fully back in the seat. Your feet should rest flat on the floor (or a footrest), thighs roughly parallel to the ground, and knees at approximately 90°. OSHA’s neutral positioning guidance specifies elbows at 90–120°, forearms parallel to the floor, and lumbar support engaged. Adjust the lumbar support so it meets your lower back without pushing you forward.
-
Position the keyboard relative to your elbows. With your arms hanging relaxed, note where your elbows sit. The keyboard surface should land at or just below that height. Keyboards placed higher than elbow level increase trapezius activity and neck MSD risk. If your desk is too high, a keyboard tray that tilts slightly negative (front edge higher than back) is the fix. If the desk is too low, raise your chair and add a footrest.
-
Place the mouse on the same surface, inside primary reach. Keeping the mouse within 20–30 cm of your resting hand position eliminates the shoulder-reach that pulls your torso and head forward. Before changing your posture, reduce pointer sensitivity so you move the mouse less. Mayo Clinic recommends keeping the mouse within easy reach on the same surface as the keyboard, wrists straight, and hands at or slightly below elbow level.
-
Adjust monitor height and distance. Position the top third of the screen positioned near eye level at a comfortable viewing distance. A monitor that sits too low forces your head to drop and increases upper cervical flexion.
-
Verify with a side photo. Take a quick photo from the side after a five-minute typing session. Your ear should sit roughly over your shoulder, not in front of it.
Pro Tip: If you use a laptop as your primary machine, a riser plus an external keyboard and mouse is the single most effective fix for tech-related forward head posture. The laptop screen alone forces a compromise between neck angle and wrist position that no amount of chair adjustment can fully solve.
Why does workstation positioning actually affect your neck?
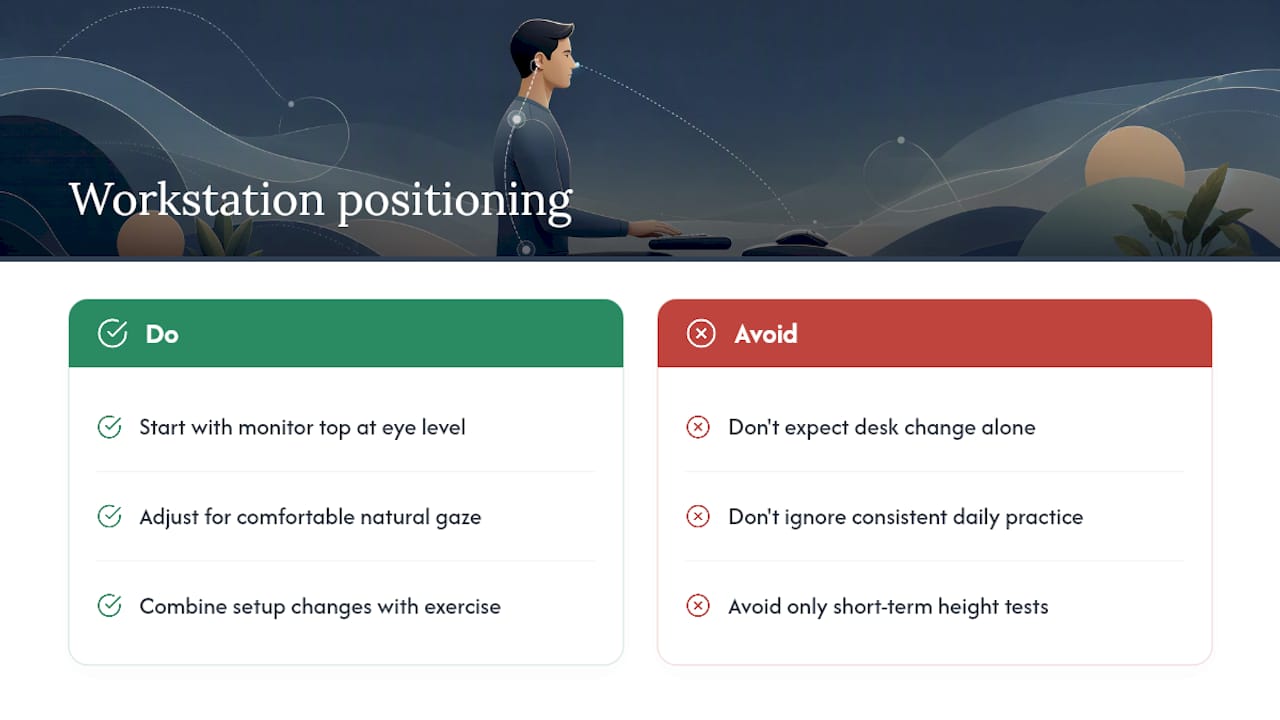
Your head weighs roughly 10–12 pounds in neutral alignment. As it translates forward, the effective load on your cervical spine increases substantially with each inch of forward displacement, overloading the upper trapezius and cervical extensor muscles. That chronic overload is what produces the stiffness and headaches you feel after a long session.
Research on monitor height shows that screen position alters the ratio of head flexion to neck flexion in ways that are not always intuitive. Lowering a monitor can increase head flexion relative to the neck by around 5° while simultaneously bringing gaze angle closer to a comfortable range.
The takeaway: “monitor top at eye level” is a useful starting heuristic, but your comfortable natural gaze matters more than hitting a precise geometric angle.
On the evidence: A PMC-published study on chair and VDU height adjustments found that workstation changes can reduce upper-quadrant musculoskeletal pain, but reviews consistently note moderate and mixed evidence. No single ergonomic intervention is strongly supported in isolation. Combining setup changes with exercise and microbreaks produces better outcomes than adjusting the desk alone.
One important caveat: short-term VDT height experiments found measurable postural angle differences between desktop and elevated screen positions but no change in cervical flexion moment during brief tasks.
Ergonomic adjustments shift your posture, but the biomechanical load benefits take consistent daily practice to accumulate. Neck pain is multifactorial, and a corrected desk alone rarely resolves chronic symptoms.
How do you measure forward head posture and track your progress?
The craniovertebral angle (CVA) is the most practical measurement for tracking forward head posture outside a clinic. It is the angle formed between a horizontal line through the seventh cervical vertebra (C7) and a line from C7 to the tragus of the ear. A smaller CVA indicates greater forward head displacement; angles below roughly 50° are commonly associated with symptomatic forward head posture.
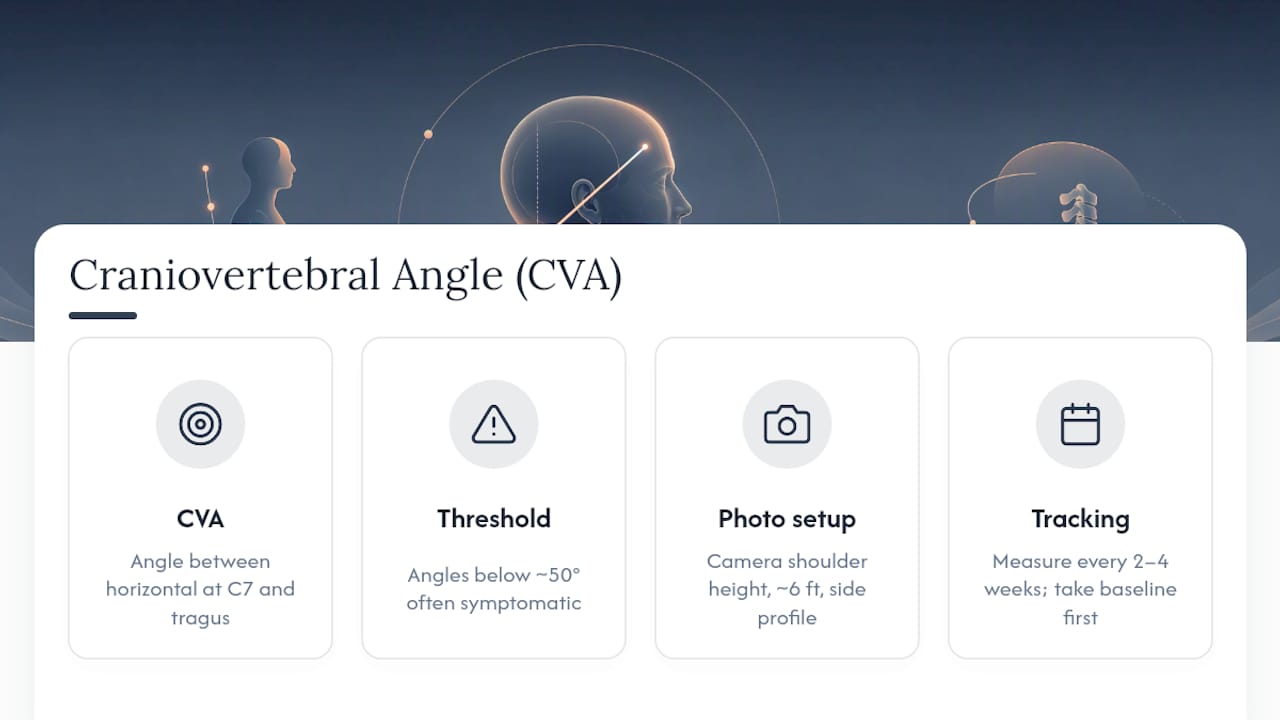
Photogrammetry research confirms that CVA measured via photographic analysis and apps like Posture Screen Mobile is a reliable, repeatable method accessible to nonclinicians.
Photo protocol: Stand or sit in your normal working position. Place the camera at shoulder height, about six feet away, and shoot from a true side profile. Keep your expression neutral and avoid correcting your posture for the photo. Measure every two to four weeks.
Use this tracking table:
Pro Tip: Take your baseline photo before making any setup changes. Without a before measurement, small improvements are invisible and easy to dismiss.
What setup mistakes make forward head posture worse?
Most workstations have at least one of these problems:
- Chair without lumbar support or set too low. Causes the pelvis to tilt back, which collapses the thoracic spine and pushes the head forward. Fix: how ergonomic chairs improve head posture explains what to look for.
Red flags that warrant a clinician visit: worsening headaches despite setup corrections, numbness or tingling in the arms or hands, progressive weakness, or symptoms that radiate below the shoulder blade. These are not posture problems you should self-manage.
What daily habits reinforce your new setup?
Setup changes alone wear off. Your nervous system defaults to familiar patterns, especially under deadline pressure. Short, frequent movement breaks interrupt that drift.
-
Set a 25–30 minute timer. When it fires, stand up, do five chin retractions (tuck your chin straight back, not down), and squeeze your shoulder blades together for three seconds. That combination directly counters the forward-head, rounded-shoulder pattern.
-
Chin retraction drill. Standing or seated, draw your head straight back as if making a double chin. Hold two seconds, release. Ten reps, twice daily. This activates the deep cervical flexors that forward head posture chronically inhibits.
-
Doorway pec stretch. Place forearms on a door frame at 90°, step through gently until you feel a stretch across the chest. Hold 20–30 seconds. Tight pectorals pull the shoulders forward and contribute to the forward head pattern. Sitting posture and head alignment are closely linked through thoracic position, and this stretch addresses both.
Adding strength training for office workers to your routine builds the deep neck and scapular stabilizers that make ergonomic corrections stick.
Pro Tip: Pair your microbreak timer with something you already do, like refilling your water. Habit stacking makes the routine automatic within two to three weeks.
Safety note: Stop any movement that produces sharp pain, increases headache, or causes tingling. Scale back to a comfortable range and consult a clinician if symptoms persist.
When should you expect results, and when should you see a doctor?
Small postural shifts are realistic within 2–6 weeks of consistent setup plus daily movement. CVA improvements and meaningful symptom reduction often lag behind behavioral changes by several weeks.
Seek professional care if you experience:
- Persistent or worsening headaches after four weeks of consistent changes
- Neurological signs: numbness, tingling, or weakness in the arms or hands
- No measurable improvement in CVA or pain rating after 8–12 weeks of consistent effort
The evidence on ergonomics interventions is genuinely mixed in randomized controlled trials. Combining setup corrections with targeted exercise and, when needed, clinical input produces the most reliable outcomes.
Key Takeaways
Correcting keyboard and mouse ergonomics for forward head posture requires three simultaneous anchors: keyboard at or slightly below elbow height, mouse inside primary reach on the same surface, and monitor top at or slightly below eye level.
| Point | Details |
|---|---|
| Keyboard height is the anchor | Set keyboard at or slightly below elbow level; higher positions increase trapezius load and neck MSD risk. |
| Mouse reach drives head position | Keep the mouse within 20–30 cm of resting hand position to eliminate the shoulder reach that pulls the head forward. |
| Monitor top, not center, at eye level | Position the top third of the screen at or slightly below eye level; arm’s length distance. |
| Measure CVA to track progress | Use a side photo and craniovertebral angle every 2–4 weeks; expect small shifts in 2–6 weeks of consistent effort. |
| Bestforwardheadposturefix for structured guidance | The site offers science-backed education, habit-building modules, and measurement templates for readers who want a guided program. |
The part most ergonomic guides skip
The conventional advice treats workstation setup as a one-time fix. Adjust the chair, move the monitor, done. What that framing misses is that your environment shapes behavior only as long as you notice it.
Within a few days of a new setup, the novelty fades and old motor patterns reassert themselves, especially under cognitive load.
The more durable approach is environment-first but habit-second. Get the physical setup right, then build the smallest possible movement routine around it.
Two minutes of chin retractions and shoulder blade squeezes every 30 minutes does more for chronic neck stiffness than a perfect desk that you sit at motionlessly for six hours.
The research on combined interventions supports this: ergonomic changes paired with exercise and microbreaks consistently outperform either alone.
There is also a measurement gap. Most people make changes and then assess progress by how they feel, which is unreliable. Tracking CVA with a phone photo every few weeks gives you an objective signal.
Small angle improvements that you cannot feel yet are still real progress, and seeing them keeps you consistent when symptoms fluctuate.
What Bestforwardheadposturefix offers readers who want to go further?
Adjusting your desk is the right first step. Sustaining the change is where most people stall, and that is exactly what Bestforwardheadposturefix is built for.
The site provides structured, science-backed education on forward head posture correction: habit-building modules, guided measurement templates for tracking your craniovertebral angle over time, and step-by-step programs that combine ergonomic setup with targeted exercise progressions.

If you want a guided program rather than piecing together advice from scattered sources, visit Bestforwardheadposturefix to access the full library of posture correction resources and start a structured plan today.
Useful sources
- The effect of a workstation chair and computer screen height adjustment on neck and upper back musculoskeletal pain and sitting comfort in office workers – PMC
- The influence of “eye level” and “low” monitor locations on head and neck posture – ScienceDirect
- The relationship between head and neck posture and VDT screen height in keyboard operators – PubMed
- Computer workstations — OSHA
- Office ergonomics — Mayo Clinic
- Photogrammetry and posture assessment validation and applications – PMC
- The ideal ergonomic desk setup — Contour Design
- Best desk setup for neck pain — PostureSolved