The most reliable posture progress tracking system combines three things: a standardized baseline photo protocol, weekly objective checks, and daily posture-reset mini-routines logged in one place. None of these alone tells you much. Together, they cross-check each other so you’re not fooled by good lighting, a lucky angle, or a single sore day.
Here’s the 10-minute starter plan.
- Set your baseline today. Put your phone on a tripod (or stack of books) at chest height, six feet away, in a room with consistent lighting. Take a relaxed side photo and a front photo in fitted clothing.
- Log the metadata. Write down the date, time of day, what you did in the hour before (sat at a desk, drove, worked out), and rate your neck and shoulder discomfort from 1 to 10.
- Schedule the repeat. Set a recurring reminder for the same day and time next week. Same tripod height, same spot, same lighting.
This mix works because it’s low friction enough to sustain past week one, and because photos, numbers, and habit logs rarely all drift in the same direction by accident. If two out of three show improvement, you’re probably seeing something real.
Pro Tip: Tape an X on the floor where your feet go for every photo. That one habit fixes more measurement error than any app feature will.
Key Takeaways
Reliable posture progress tracking depends on standardizing your baseline photos, checking objective markers weekly, and cross-validating visual change against functional improvement before calling it real progress.
| Point | Details |
|---|---|
| Standardize your baseline | Fix tripod height, distance, lighting, and clothing so every future photo is truly comparable. |
| Mix at least two methods | Pair photos with a numeric proxy like a self-score or webcam scan to avoid false positives. |
| Track functional, not just visual, change | Log neck range of motion and pain frequency alongside your photos every week. |
| Give it real time | Expect early awareness shifts within days, visible change within three to four weeks, and functional gains over four to twelve weeks. |
| Escalate at stagnation | See a clinician if pain worsens or nothing improves after twelve weeks of consistent tracking. |
Table of Contents
- Why Combine Photos, Tech Scans, and Habit Logs
- Which Posture Tracking Method Fits Your Situation
- How Do You Set Up a Repeatable Posture Baseline?
- What Metrics Actually Matter Month to Month
- What a 4 to 12 Week Tracking Routine Looks Like
- Common Tracking Mistakes That Fake Progress (or Hide It)
- How Bestforwardheadposturefix Approaches Posture Tracking
- What Most Posture Advice Gets Backward
- Frequently Asked Questions
- Sources
Why Combine Photos, Tech Scans, and Habit Logs
Each tracking method answers a different question, and none answers all of them. Relying on just one is how people convince themselves they’re improving when they’re not, or give up on progress that’s actually happening.
Standardized photos show visible change over months, things like a shoulder that’s dropped back into line or a head that no longer juts past the shoulder line in a side view. What they can’t prove is why something changed. A photo can’t tell you if your neck angle improved because your muscles rebalanced or because you happened to stand up straighter for the camera.
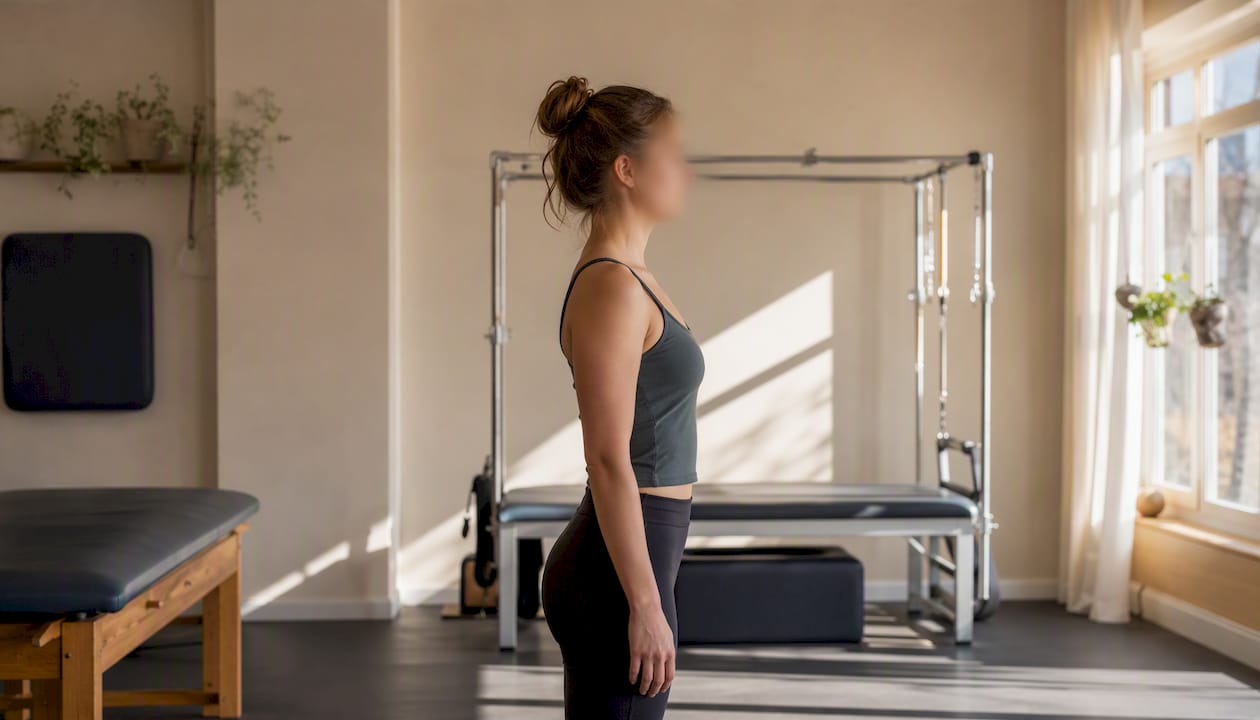
Camera-based computer vision scans give you repeatable keypoints (ear, shoulder, hip markers) in seconds, and some platforms claim users notice awareness shifts within five to seven days simply because measuring the posture changes how you hold it. The tradeoff is real: lighting shifts, camera angle, and privacy concerns around webcam-based scanning all introduce noise you have to control for.
Wearables track continuous data like minutes spent upright or how often you slouch, which is useful for adherence but weak on specifics. A wearable can tell you that you slouched 40 times today. It can’t tell you whether your cervical angle actually improved.
- Photos: strong for visual before-and-after, weak for mechanism
- Computer vision: fast and objective, sensitive to setup
- Wearables: great for volume of good behavior, vague on alignment detail
- App logs: good for motivation, variable in measurement rigor
Which Posture Tracking Method Fits Your Situation
Picking a method comes down to what you’re optimizing for: cost, precision, or convenience. Most people end up using two.
- Self-photo tracking costs nothing beyond a tripod and takes five minutes a week. It’s the best option for visual before-and-after documentation, especially for forward head posture, where the side profile view is genuinely diagnostic. The catch is that it demands discipline. One photo taken at a different distance or height can erase a month of real progress from the record.
- Webcam or computer-vision scans give you numeric keypoints without needing a professional. They’re fast and remove some of the subjectivity of eyeballing a photo. But calibration matters more than most people realize. A deep dive into how these scans work shows that keypoint detection can shift when you switch cameras or move your tripod, which can look like anatomical change when it’s actually a setup change.
- Wearables and sensors log posture time and movement volume continuously, which is unmatched for adherence data. Smart fitness trackers build habit awareness the same way a step counter does, by making the invisible visible. They’re the weakest option for pinpointing what’s actually changed in your neck angle or shoulder position.
- App logs and guided programs turn tracking into a game with streaks, reminders, and progress graphs. App listings for posture-correction programs commonly feature progress graphs and short challenge formats built to keep you coming back. Motivating, yes. Just don’t assume every graph reflects a validated measurement.
- Clinical measures taken by a physical therapist or chiropractor remain the gold standard for diagnosis, using tools and angles that home methods can’t replicate. If pain persists past 12 weeks of consistent self-tracking with no functional gains, this is where you escalate.
For most people starting out, self-photos plus one numeric proxy (a self-score or a webcam scan) is enough. Add a wearable later if adherence, not measurement, is your bigger problem.
How Do You Set Up a Repeatable Posture Baseline?
A baseline is only useful if every future photo can be compared to it fairly. Sloppy setup is the single biggest reason people misread their own progress, since self-assessment by photo becomes misleading the moment tripod height, distance, or lighting drift from one session to the next.
- Fix the camera position. Use a tripod or a stable surface at chest height, roughly six feet from where you’ll stand. Mark that spot with tape.
- Control the environment. Same room, same lighting (natural daylight from a window works well), and a plain wall behind you so your outline is easy to see.
- Standardize your clothing. Fitted, plain clothing every time. Baggy shirts hide the exact shoulder and neck lines you’re trying to track.
- Take three shots. A relaxed standing side view, a relaxed front view, and a wall test where you stand with heels, glutes, and shoulder blades against a wall to see how far your head sits from it.
- Add a chin-tuck photo. This shows range of motion, not just static alignment, and catches functional change that a resting photo misses.
From each set, record four numbers: the ear-to-shoulder vertical offset (measured in inches from the photo), a rough cervical angle estimate, a 1 to 10 self-rated posture and fatigue score, and how often you noticed pain that week. A randomized study on objective posture measurement found that consistent protocols meaningfully improve the reliability of these markers, which is really the whole point of standardizing your setup in the first place.
Log the metadata every time: date, time of day, what you did beforehand, and which device you used. A phone camera and a laptop webcam produce slightly different angles, so switching mid-tracking without noting it will confuse your own data.
What Metrics Actually Matter Month to Month
Weekly snapshots are noisy. A single bad night’s sleep or a long drive can throw off your numbers for a day. The fix is aggregating your weekly logs into a monthly trend, which smooths out the noise and shows the real direction of travel.
Three visual markers matter most: head-forward distance from the wall test, whether shoulder rounding looks less pronounced in the front photo, and any visible change in spinal curvature from the side view.
Pair those with numeric proxies you can track on a simple spreadsheet or notebook:
- Estimated cervical angle from your standardized photo
- Posture self-score, 1 to 10, logged daily or weekly
- Minutes spent in upright posture, from a wearable or a self-timed hourly check
Functional measures round out the picture, since visual change without functional change is a warning sign, not a win. Track active neck range of motion (how far you can turn your head each direction without strain) and log pain frequency and intensity separately, since a headache twice a week matters differently than constant low-grade stiffness.
Build a monthly chart with at least two objective proxies alongside one functional metric. If your photos look better but your neck rotation hasn’t improved and pain is unchanged, that’s a signal to dig deeper, not celebrate yet.
What a 4 to 12 Week Tracking Routine Looks Like
Expect visible photo change before you feel functional change, and expect both to take longer than most people hope. Commercial posture-tracking platforms recommend around 15 minutes daily for four to six weeks as a practical minimum, and several fitness outlets report visible improvement within three to four weeks of consistent daily practice.
- Daily: One or two posture resets, 30 to 60 seconds each (a doorway chest stretch, a chin tuck against a wall), plus a quick 1 to 10 self-score before bed.
- Weekly: Retake your standardized photos or run a quick tech scan. Log your numeric proxies and note any pain or range-of-motion shift since last week.
- Monthly: Line up your photos side by side. Review the trend across all your numbers, not just one week’s snapshot, and adjust your routine’s intensity based on what the data shows.
- Escalate if: pain worsens, you notice tingling or numbness (a neurological symptom that warrants a professional look), or you’ve hit 12 weeks of consistent tracking with zero functional gain despite sticking to the plan.
Pro Tip: Keep your daily resets short on purpose. A 25-day exercise-focused transformation reported by Men’s Health worked because the drills were small enough to actually finish every day, not because they were intense.
Short, frequent daily checks paired with a single monthly deep review tend to hold motivation steady without tipping into obsessive measuring, which is its own problem.

Common Tracking Mistakes That Fake Progress (or Hide It)
Most false positives in posture tracking come down to sloppy controls, not actual body changes. Keep your camera height, distance, and lens the same across every session. Switching from your phone’s front camera to a laptop webcam mid-tracking will shift your numbers in ways that have nothing to do with your spine.
Clothing matters more than people expect. Wear tight, plain clothing every time, and resist the urge to stretch or “set” your posture right before the photo. That instinct to stand extra tall for the camera is exactly what ruins the comparison.
Cross-validate every visual change against a functional one. If your side photo looks better but your neck rotation and pain levels haven’t budged, treat that as inconclusive rather than proof.
- Keep camera setup identical every session
- Skip the pre-photo posture “prime”
- Confirm visual gains with a functional gain (less pain, better rotation)
- Watch for score obsession. Chasing one perfect number often causes more tension than it resolves, since practitioners increasingly frame the real goal as posture fluidity, or moving comfortably between positions, rather than holding one static “ideal” angle indefinitely
How Bestforwardheadposturefix Approaches Posture Tracking
Bestforwardheadposturefix builds its guidance around habit change, awareness building, and muscle rebalancing rather than one-time fixes, which is exactly why mixed-method tracking fits the approach. A single photo or scan can’t capture a habit shift; a month of consistent logs can.
- The site’s home posture check-in guide walks through the same photo protocol covered above, adapted for a first-time reader.
- The daily self-check routine pairs well with the weekly and monthly checkpoints outlined in this article.
- Readers ready to move from tracking into correction can use the postural assessment to corrective routine guide to turn their logged data into a targeted plan.
The throughline across all of it: measurement only matters if it changes what you do next.
What Most Posture Advice Gets Backward
Most posture content treats tracking as an afterthought, a nice-to-have after you’ve picked your exercises. The research says otherwise. Measurement itself changes behavior, sometimes faster than the exercises do, which means the tracking system isn’t a bookkeeping exercise bolted onto the real work. It’s part of the intervention.
The conventional advice to “just check your posture in the mirror” falls apart specifically because it isn’t standardized. Without a fixed camera position and consistent conditions, you’re comparing noise to noise. That’s not tracking, it’s guessing with extra steps.
What deserves more attention is the emotional trap of over-measuring. Chasing a single perfect angle, obsessing over one week’s dip in your self-score, tends to backfire. The better mental model is fluidity: can you move comfortably in and out of good alignment, not just hold one static pose for a photo. Prioritize that, and the numbers tend to follow.
Frequently Asked Questions
How often should I take posture progress photos?
Weekly is the sweet spot for most people. Daily photos add noise without adding useful signal, and monthly alone misses short-term setbacks worth catching early.
What’s a realistic timeline to see posture improvement?
Awareness-driven changes can show up within days of starting to measure, visible photo differences often appear within three to four weeks of consistent practice, and functional gains like reduced pain typically take four to twelve weeks.
Can I track posture progress without an app?
Yes. A tripod, consistent lighting, and a notebook for logging your numbers and pain levels covers most of what a paid app offers. Apps add convenience and motivation features like streaks and graphs, not necessarily better measurement.
Why do my posture photos look worse some weeks even though I’m doing the exercises?
Camera setup drift is the most common culprit: different distance, different lighting, different clothing. Rule that out before assuming your posture actually regressed.
When should I stop self-tracking and see a professional?
If you’ve tracked consistently for 12 weeks with no functional improvement, or if you notice new symptoms like tingling, numbness, or worsening pain, that’s the point to bring your logged data to a physical therapist or chiropractor.
Sources
For readers who want the underlying evidence behind these timelines and methods, these sources cover the measurement science, the habit-based improvement claims, and the technology behind webcam scans.