The chair comes first. Set the seat height so your feet rest flat, lock in lumbar support at your beltline, then raise your screen so the top edge sits at eye level and switch to an external keyboard and mouse. Those three moves fix most of the neck strain, shoulder tension, and lower back pain that home offices cause, and you can do all three in under 20 minutes without buying anything expensive.
TL;DR:
- Ensuring your chair has the correct height, lumbar support at belt level, and relaxed armrests is essential to prevent neck and back strain.
- Desk height should match your elbow angle, with a footrest or keyboard tray used to address mismatched furniture for optimal comfort.
- Position your monitor so its top is at or slightly below eye level and about an arm’s length away, with font size adjusted for clarity.
- Pair a laptop with an external keyboard and monitor riser to avoid neck strain, limiting full laptop use to under two hours when possible.
- Regular movement, microbreaks every 20 to 30 minutes, and posture checks improve long-term comfort and reduce injury risks.
Table of Contents
- Chair Setup: Seat Height, Lumbar Support, and Armrests
- Desk Height: Matching Your Surface to Your Chair
- Monitor Placement: Height, Distance, and Angle
- Keyboard and Mouse: Keeping Wrists Neutral
- Laptop Ergonomics: Why a Laptop Alone Isn’t Enough
- Lighting, Glare, and Which Accessories Are Worth Buying
- Movement and Microbreaks: The Habit That Actually Prevents Strain
- Your Home Office Setup Checklist and Morning Routine
- How This Setup Connects to Forward Head Posture
- What Most Home Offices Get Wrong
- Ready to Go Deeper on Posture Correction?
- Sources
Chair Setup: Seat Height, Lumbar Support, and Armrests
Your chair sets the baseline for everything above it. If the seat is too low or too high, your knees, hips, and neck all compensate, and forward head posture usually starts with the spine collapsing somewhere below it.
Start with seat height: your feet should rest flat on the floor or a footrest, with knees bent close to 90 degrees. Lumbar support belongs right at your beltline, around the L3 to L4 region of your lower back, not higher up near your shoulder blades. Leave a two-finger gap between the back of your knees and the seat edge. Armrests should let your shoulders relax down, not shrug up toward your ears.
- Feet flat on the floor or a footrest, knees near 90 degrees
- Lumbar support positioned at beltline height
- Two-finger gap behind the knees for proper seat depth
- Armrests low enough that shoulders stay relaxed
No adjustable chair on hand? A rolled towel or small cushion behind your lower back works surprisingly well as a stopgap, and a stack of books under your feet does the same job as a footrest. UCSF’s remote work ergonomics guidance recommends task chairs with real back support and adjustable seat height as the starting point for any home setup, buying one if your budget allows it.
Pro Tip: Sit all the way back in the chair before adjusting anything else. Most people perch on the front edge out of habit, which defeats the lumbar support entirely.
Desk Height: Matching Your Surface to Your Chair
Once your chair is set, the desk has to match it, not the other way around. Your elbows should bend between 90 and 120 degrees when your hands rest on the keyboard, with shoulders relaxed and forearms roughly level with the desktop.
Fixed-height desks often create a mismatch: raise the chair enough to hit the right elbow angle, and your feet lose contact with the floor. A footrest solves that instantly. If the desk sits too low even at your chair’s lowest setting, a keyboard tray raises your typing surface without forcing you to hunch.
- Elbows bent 90 to 120 degrees with wrists neutral
- Footrest if chair height leaves feet dangling
- Keyboard tray if the desk sits too low to begin with
- At least a few inches of clearance under the desk so knees and legs can move freely
Check that clearance last. A desk drawer or support beam that blocks your legs forces you to sit farther back, which pulls your whole body away from the keyboard and pushes your head forward to compensate.
Monitor Placement: Height, Distance, and Angle
Screen position drives more neck strain than almost anything else in a home office, and it is the single easiest fix on this list. The top of your monitor should sit at or slightly below eye level, so your gaze drops about 15 to 20 degrees downward when you’re reading the middle of the screen.
Distance matters just as much as height. Position the screen roughly an arm’s length away, somewhere between 20 and 30 inches. If text looks small at that distance, increase the font size. Do not lean closer, since that’s exactly the habit that drags your head forward hour after hour.
- Top of screen at or just below eye level
- Gaze angle of 15 to 20 degrees downward
- Screen distance of 20 to 30 inches, adjusted with font size, not proximity
- Primary monitor centered directly in front of you; secondary screens angled inward and positioned slightly closer if used heavily
Mayo Clinic’s office ergonomics guide lists monitor height and distance among the core adjustments for reducing neck and back discomfort, right alongside chair and desk setup.
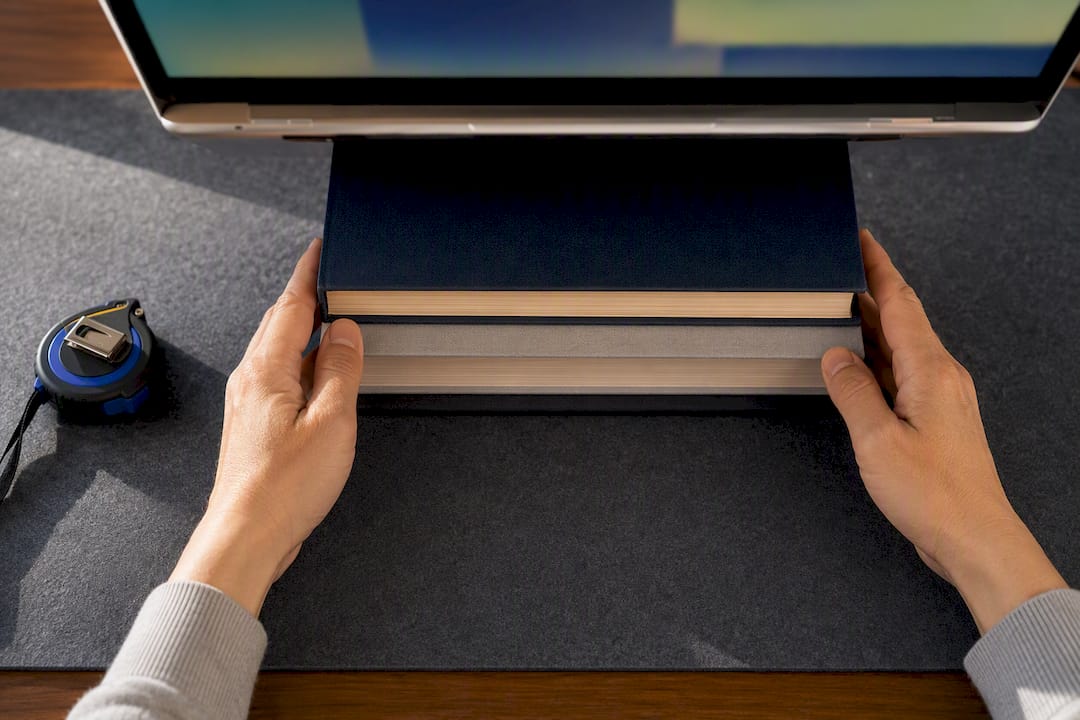
Pro Tip: A stack of hardcover books under a laptop or monitor costs nothing and works as well as a $40 stand. Measure eye level first, then stack until the top edge lines up.
Keyboard and Mouse: Keeping Wrists Neutral
Your keyboard should sit at elbow height with wrists flat, not bent up or down. A slight negative tilt, where the back of the keyboard sits lower than the front, keeps wrists straighter than a flat or positive-tilt setup.
Keep the mouse right next to the keyboard. Reaching for a mouse set too far away rotates your shoulder forward repeatedly through the day, which adds up. If you’re on a laptop, an external keyboard and mouse combination fixes both the wrist angle and the reach problem at once.
- Keyboard at elbow height, wrists flat and neutral
- Slight negative tilt to avoid wrist extension
- Mouse positioned directly beside the keyboard, not across the desk
- Wrist rests used only between typing bursts, never pressed into while actively typing
Laptop Ergonomics: Why a Laptop Alone Isn’t Enough
A laptop screen and keyboard are built into one fixed unit, which means you can never get the screen at eye level and the keyboard at elbow height simultaneously. Something always has to be wrong. That mismatch is one of the most preventable causes of neck and upper back strain among remote workers, according to UPenn’s home office ergonomics guidance, which recommends pairing every laptop with an external keyboard and mouse whenever possible.
Raise the screen with a laptop riser or a stack of books, then plug in separate input devices. If that setup isn’t available, Stanford EH&S advises keeping unperipheralized laptop sessions under two hours and taking more frequent microbreaks in the meantime.
- Pair every laptop with an external keyboard and mouse when possible
- Raise the screen to eye level using a riser or stacked books
- Limit laptop-only sessions to under two hours
- On the go: a laptop wedge, an angled lap desk, and a foldable travel keyboard cover most situations
Pro Tip: If you’re stuck on a laptop for a full day, alternate between sitting and standing every 20 to 30 minutes rather than holding one position for hours.
Lighting, Glare, and Which Accessories Are Worth Buying
Bad lighting makes you lean toward the screen without noticing it, which quietly recreates the same forward head posture you’re trying to avoid. Match your monitor brightness to the room around it, aim for roughly 300 to 500 lux in your work area, and adjust color temperature cooler for daytime and warmer for evening sessions.
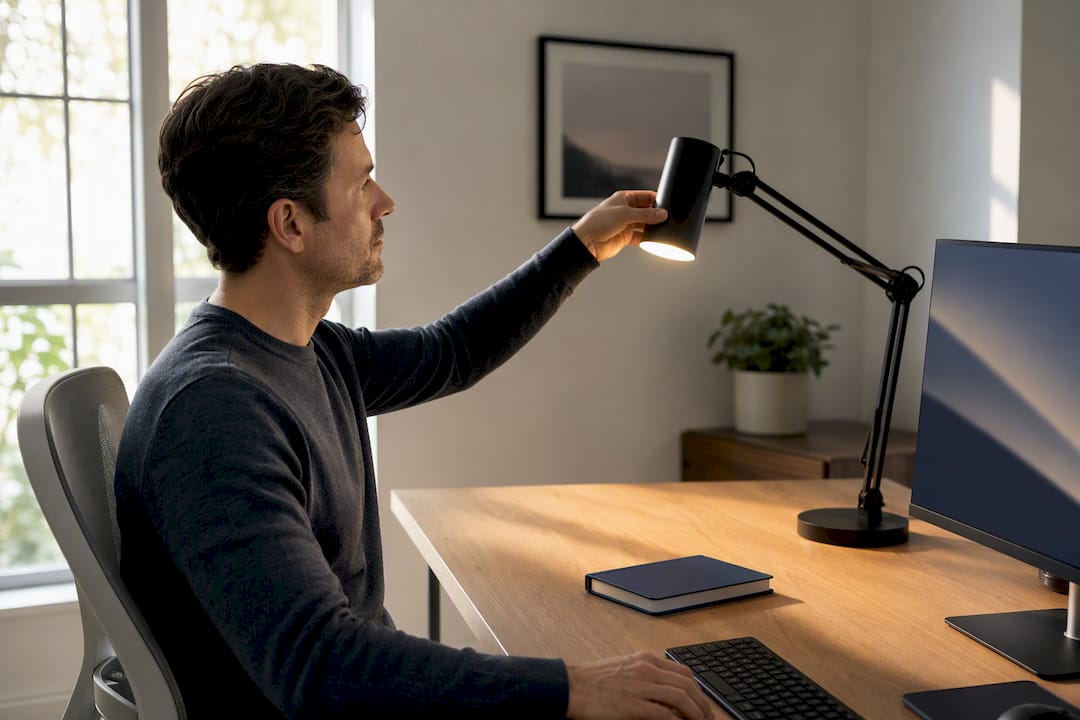
Position your desk perpendicular to windows rather than facing or backing into one, and add an adjustable desk lamp for task lighting. If glare hits the screen directly, tilt the monitor or add a matte screen filter.
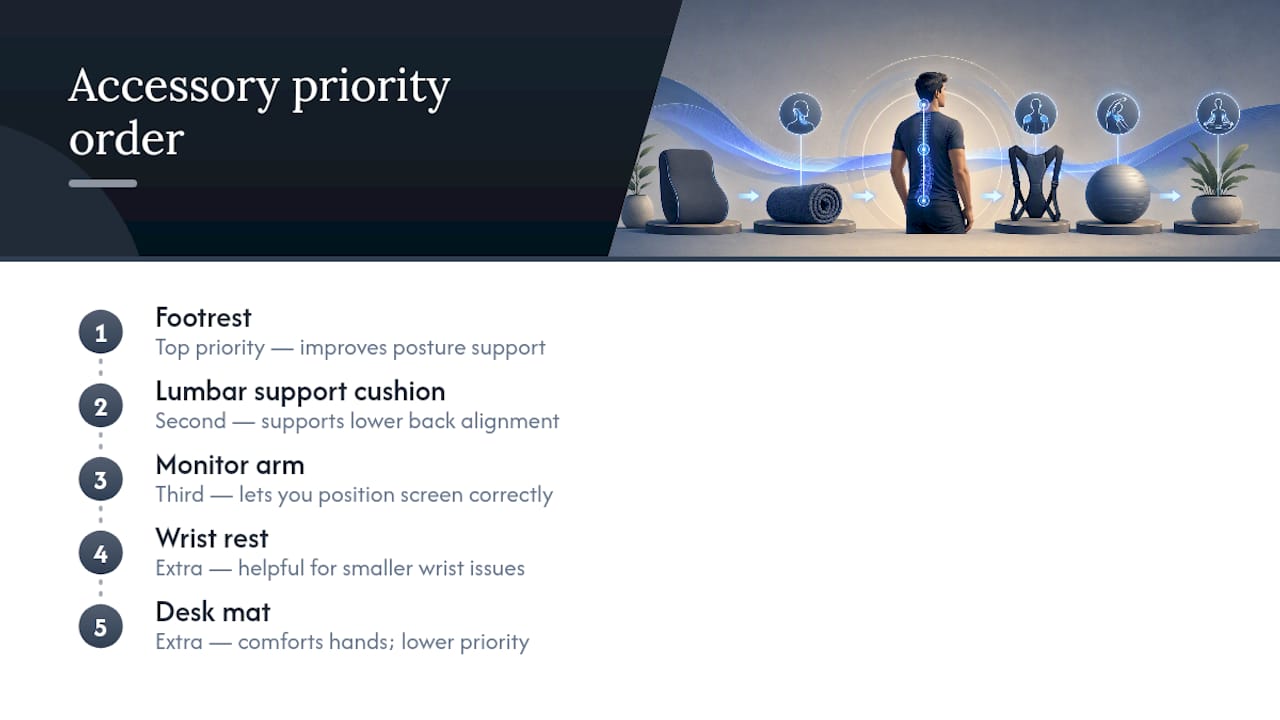
For accessories, prioritize in this order: footrest, lumbar support cushion, then a monitor arm. Wrist rests and desk mats are nice extras, but they solve smaller problems than the first three.
Movement and Microbreaks: The Habit That Actually Prevents Strain
No posture holds up for eight straight hours, no matter how well you’ve set up your desk. UCSF’s ergonomics research points to dynamic sitting, regularly shifting position, as more effective at preventing fatigue than trying to hold one “perfect” posture all day.
- Take a one to two minute microbreak every 20 to 30 minutes, just standing, stretching, or looking away from the screen.
- Take at least five minutes away from the desk every 60 to 90 minutes.
- If you have a sit-stand desk, alternate in 20 to 30 minute intervals rather than standing for hours straight.
- Add a few shoulder rolls, chin tucks, and gentle neck stretches into each break.
Pro Tip: Set a recurring timer on your phone or use a break-reminder app. Willpower alone rarely holds up past the third hour of a workday.
Your Home Office Setup Checklist and Morning Routine
Work through your setup in a fixed order, because each step depends on the one before it:
- Chair: seat height, lumbar support, armrests
- Desk: height matched to elbow angle, clearance underneath
- Monitor: height, distance, angle
- Keyboard and mouse: elbow height, neutral wrists, mouse beside keyboard
- Lighting: brightness matched to the room, glare eliminated
- Accessories: footrest, lumbar cushion, monitor arm as budget allows
A 90-second morning check catches drift before it becomes a full day of bad posture. Ergonomic checklists built for 2026 home offices recommend running through chair height, lumbar position, monitor height, mouse reach, and your break timer every morning before you start working.
| Priority | What to buy | Rough order |
|---|---|---|
| 1 | Adjustable chair or lumbar cushion | Buy first |
| 2 | Monitor riser or stand | Buy second |
| 3 | External keyboard and mouse | Buy second |
| 4 | Footrest | Buy third |
| 5 | Monitor arm | Buy when budget allows |
For a deeper walkthrough of each adjustment, this step-by-step desk setup guide covers the full sequence in more detail.
How This Setup Connects to Forward Head Posture
Every adjustment above serves one mechanical goal: removing the sustained neck flexion that pulls your head forward hour after hour. Raise the screen, and you eliminate the need to look down. Fix the chair and desk, and you stop leaning forward to compensate for poor support.
- Workstation fixes address the trigger, not the years of habit behind it
- Muscle rebalancing and awareness drills matter once the setup is correct
- Forward head posture often builds from cumulative daily positions, especially looking down at laptops and phones
For the behavioral side of correction, this guide on office ergonomics and forward head posture breaks down what setup changes can and can’t fix on their own.
What Most Home Offices Get Wrong
The biggest mistake I see repeated everywhere is laptop-only work from a couch or bed, treated as temporary for months at a time. Lighting and breaks get ignored entirely until a headache or stiff neck forces the issue.
A realistic routine doesn’t need to be elaborate: run the 90 second morning check, take microbreaks every half hour, and glance at your posture whenever you stand up. Track how your neck and shoulders feel over two weeks. Small, consistent changes beat one expensive overhaul every time.
— Madhukar
Ready to Go Deeper on Posture Correction?
A well-adjusted desk stops the damage from getting worse. It doesn’t undo months or years of neck muscles adapting to a forward-leaning position, and that’s the gap most home office guides skip entirely. Bestforwardheadposturefix focuses specifically on that second half of the problem, with structured guidance on habit change, awareness building, and muscle rebalancing designed to work alongside the setup changes covered here.

On the Bestforwardheadposturefix landing page, you’ll find posture-focused exercises and habit-tracking guidance built for people dealing with neck stiffness, tension headaches, or a head position that doesn’t sit back over the shoulders anymore. If you want the keyboard and mouse details expanded further, this guide to input device placement is a solid next stop. Pair movement habits with guidance like safe exercise practices for spine health if you’re rebuilding strength around the neck and upper back. If your symptoms have stuck around for more than a few weeks despite a better desk setup, start with the structured posture correction program and work through it at your own pace.
Sources
The workstation adjustments in this article draw on published ergonomics guidance rather than any single opinion. OSHA’s computer workstation eTool lays out basic design goals for a custom-fit setup and confirms there’s no single correct posture for everyone. UPenn EHRS and Stanford EH&S both detail laptop-specific fixes and microbreak scheduling. UCSF’s remote work ergonomics program covers chair selection and movement guidance, while Mayo Clinic’s office ergonomics guide offers a health-oriented rundown of chair, desk, monitor, and keyboard adjustments worth bookmarking for future reference.
- Home Office Ergonomics – UPenn EHRS
- Ergonomics and Remote Work | UCSF Health Ergonomics
- Office ergonomics: Your how-to guide – Mayo Clinic
- Hybrid, remote, and on-the-go ergonomics | Stanford EH&S