
Ah, the infamous text neck—a modern-day epidemic caused by our love affair with screens.
The hours spent hunched over phones and laptops lead to a forward head posture, rounded shoulders, and a strained upper back.
If you are still wondering how to fix nerd neck, do not worry; BestForwardHeadPostureFix has got a solution—rolling your upper back.
Foam rolling is not just for gym buffs; it is a highly effective way to combat text neck, improve posture, and reduce muscle tension.
In this article, we would cover everything you need to know about how to roll your upper back to correct text neck posture.
From understanding the science behind foam rolling to step-by-step instructions, practical tips, and real-life examples, you would walk away with actionable knowledge to tackle text neck like a pro.
Table of Contents
- Understanding Text Neck and Its Effects on Posture
- The Science of Foam Rolling: Why It Works
- How to Roll Your Upper Back: Step-by-Step Guide
- Tips for Maximizing Foam Rolling Benefits
- Real-Life Example: Emma’s Journey to Better Posture
- Common Mistakes to Avoid When Rolling Your Upper Back
- Conclusion: Making Foam Rolling a Habit
Understanding Text Neck and Its Effects on Posture
Text neck, or forward head posture, is a condition caused by prolonged screen use.
It occurs when the head juts forward, placing excess strain on the cervical spine.
According to a study in the Journal of Physical Therapy Science, every inch your head moves forward increases the strain on your neck by approximately 10 pounds.
This excessive load often results in tight upper back muscles, rounded shoulders, and poor posture.
Foam rolling your upper back targets the thoracic spine and surrounding muscles, helping release tension and restore proper alignment.
But why does rolling work so well?
Let’s dive into the science.
The Science of Foam Rolling: Why It Works?
Foam rolling, also known as self-myofascial release, is a technique that uses a cylindrical tool to apply targeted pressure to muscles and fascia—the connective tissue that encases and supports muscles.
This pressure works to release muscle knots, improve circulation, and enhance overall mobility, making it an effective solution for posture-related issues like text neck.
A study published in the Journal of Bodywork and Movement Therapies highlighted foam rolling’s ability to improve flexibility and reduce muscle soreness.
By breaking up adhesions and increasing blood flow to tight muscles, foam rolling promotes better recovery and mobility.
For individuals struggling with text neck, rolling the upper back is particularly beneficial.
It loosens tight thoracic muscles that contribute to rounded shoulders, promotes spinal alignment, and reduces the forward pull of the neck—a hallmark symptom of text neck.
What makes foam rolling so effective is its ability to address the root cause of text neck: poor posture and chronic muscle tension.
By regularly incorporating upper back foam rolling into your routine, you are not just relieving discomfort but also retraining your muscles and fascia to support a healthier, more upright posture.
Whether you are battling text neck or simply looking to improve your mobility, foam rolling is a scientifically supported, easy-to-implement tool for lasting results.
How to Roll Your Upper Back: Step-by-Step Guide
Now, let’s get into the nitty-gritty of how to roll your upper back effectively.
Follow these steps to target the right areas and maximize benefits:
- Choose the Right Roller:
Opt for a medium-density foam roller. If you’re new to foam rolling, avoid overly firm rollers as they can be uncomfortable. - Position Yourself Correctly:
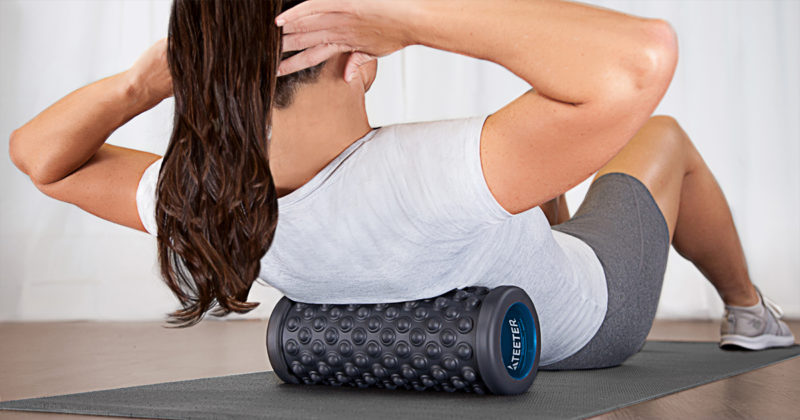
Sit on the floor and place the foam roller horizontally behind you. Lean back until your upper back rests on the roller. - Engage Your Core:
Bend your knees and keep your feet flat on the floor. Place your hands behind your head for support and engage your core to stabilize your body. - Start Rolling:
Slowly roll the foam roller up and down your upper back. Focus on the area between your shoulder blades, avoiding direct pressure on the lower back or neck. - Target Tight Spots:
Pause on any tight or tender areas for 15–30 seconds. Apply gentle pressure by slightly increasing your weight on the roller. - Repeat and Relax:
Spend 2–3 minutes rolling your upper back. Take deep breaths and move slowly to avoid discomfort.
Tips for Maximizing Foam Rolling Benefits
Foam rolling can be a game-changer for relieving muscle tension and improving posture—if done correctly.
To make the most of your foam rolling sessions, follow these expert tips:
- Roll Slowly: Resist the urge to rush. Moving too quickly won’t give your muscles and fascia the time needed to release tension. Instead, roll at a slow, steady pace, spending 20–30 seconds on each tight spot to maximize effectiveness.
- Stay Consistent: Foam rolling isn’t a one-time fix. To see real improvements in mobility and posture, aim for 3–5 sessions per week. Consistency is key to retraining your muscles and keeping them tension-free.
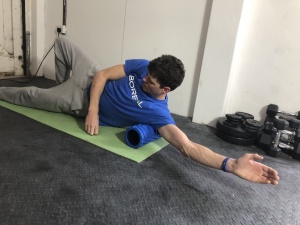
- Combine with Stretching: Foam rolling is most effective when paired with complementary stretches like cat-cow yoga pose or thoracic rotations on a bench. These movements further enhance mobility and reinforce the posture correction achieved through rolling.
- Avoid Painful Areas: Foam rolling should feel slightly uncomfortable but never painful. If you experience sharp pain, ease off the pressure or adjust your position. Discomfort signals that you’re targeting a tight area, but pain might indicate an injury.
- Hydrate: Foam rolling can release toxins stored in the fascia and muscles. Drinking water afterward helps flush these out and supports recovery.
By incorporating these tips, you will not only improve your foam rolling technique but also enhance its benefits, making it an essential part of your posture-correction and mobility routine.
Remember, small adjustments in how you roll can lead to big changes in how you feel!
Emma’s Journey: Conquering Text Neck with Foam Rolling
Emma, a freelance writer in California, spent long hours glued to her laptop, often in less-than-ideal posture.
The constant hunching left her with text neck—a condition marked by chronic neck pain, tight upper back muscles, and a persistent sense of discomfort.
Desperate for relief, she consulted a physical therapist, who suggested foam rolling as part of her recovery plan.
At first, Emma was skeptical about the idea of using a foam roller.
Could something so simple really make a difference?
Nonetheless, she committed to a daily 5-minute upper back rolling session. Positioning the foam roller beneath her shoulder blades, Emma moved slowly, targeting tight spots and releasing tension.
Within two weeks, she felt noticeable improvements: less stiffness, reduced upper back tension, and a more upright posture.
Encouraged by these results, Emma added stretches like thoracic rotations and ergonomic tweaks to her workstation setup.
She raised her laptop to eye level, used a supportive chair, and took frequent breaks to move and stretch.
Over six months, Emma’s consistent effort paid off. Her neck pain disappeared, her upper back felt stronger, and her posture improved dramatically.
Emma’s story highlights how small, consistent changes—like foam rolling—can lead to big, transformative results.
For those battling text neck, her journey serves as proof that recovery is achievable with commitment and the right tools.
Common Mistakes to Avoid When Rolling Your Upper Back
Foam rolling is an excellent tool for alleviating tension and improving posture, but even well-meaning efforts can backfire without proper technique.
To get the most out of your foam rolling sessions and avoid setbacks, steer clear of these common mistakes:
- Rolling Too Quickly: Foam rolling isn’t a race. Fast movements may feel productive, but they don’t give your muscles enough time to release tension or address stubborn knots effectively. Slow, deliberate rolling allows the pressure to penetrate the fascia and produce meaningful results.
- Skipping Warm-Up: Cold muscles are less pliable and more prone to discomfort. Before foam rolling, spend a few minutes doing light stretches or a quick warm-up to prepare your body. This simple step can improve the effectiveness of your session.
- Overdoing It: While it’s tempting to apply maximum pressure for faster results, overdoing it can bruise muscles or exacerbate soreness. Start gently, especially if you’re new to foam rolling, and gradually increase the intensity as your body adapts.
- Focusing on the Neck: Foam rolling is designed for the upper back, not the delicate cervical spine. Rolling directly on your neck can cause strain or discomfort. Instead, target the thoracic area to support overall neck and spine alignment.
- Ignoring Form: Poor posture while foam rolling diminishes its effectiveness and may strain other areas. Ensure your core is engaged, and your body is properly aligned throughout the process.
Avoiding these pitfalls will enhance the benefits of foam rolling, making it a safer and more effective practice for alleviating text neck symptoms and improving posture.
Making Foam Rolling a Habit
Foam rolling your upper back is an easy, effective way to combat text neck and improve posture.
By targeting tight thoracic muscles and enhancing mobility, this simple technique can significantly reduce discomfort and restore alignment.
The key to success lies in consistency.
Integrate foam rolling into your daily routine, whether it is after work or before bed.
Pair it with stretches, ergonomic adjustments, and regular movement breaks for maximum benefits.
Remember Emma’s story: even small, consistent efforts can make a world of difference.
So grab your foam roller, hit the floor, and roll your way to a healthier, more aligned posture.
Your upper back—and your neck—will thank you!
References:

